 UPDF for Windows
 UPDF for Mac
 UPDF for iPhone/iPad
 UPDF for Android
 UPDF AI Online
 UPDF Sign
 Edit PDF
 Annotate PDF
 Create PDF
 PDF Form
 Edit links
 Convert PDF
 OCR
OCR PDF to Word
 PDF to Image
 PDF to Excel
 Organize PDF
 Merge PDF
 Split PDF
 Crop PDF
 Rotate PDF
 Protect PDF
 Sign PDF
 Redact PDF
 Sanitize PDF
 Remove Security
 Read PDF
 UPDF Cloud
 Compress PDF
 Print PDF
 Batch Process
 About UPDF AI
 UPDF AI Solutions
 AI User Guide
 FAQ about UPDF AI
 Summarize PDF
 Translate PDF
 Chat with PDF
 Chat with AI
 Chat with image
 PDF to Mind Map
 Explain PDF
 Deep Research
 Paper Search
 AI Proofreader
 AI Writer
 AI Homework Helper
 AI Quiz Generator
 AI Math Solver
 PDF to Word
 PDF to Excel
 PDF to PowerPoint
 User Guide
 UPDF Tricks
 FAQs
FAQs UPDF Reviews
 Download Center
 Blog
Blog Newsroom
 Tech Spec
 Updates
 UPDF vs. Adobe Acrobat
 UPDF vs. Foxit
 UPDF vs. PDF Expert
Recording your Mac screen with audio can present a number of challenges. By default, Apple’s QuickTime Player won’t capture internal system sound. In addition, missing microphone permissions or wrong input settings can leave recordings silent.
To resolve all these issues, this guide explores why Mac screen recordings often lack sound. We will also show you how to record screen and audio on a Mac together. Read on to find detailed step-by-step solutions and stay tuned till the end for a powerful workflow tip with UPDF.
Windows • macOS • iOS • Android 100% secure
1.Why Does My Mac Screen Recording Have No Sound?
Let’s explore all the issues and their fixes to seamlessly screen record with audio on Mac.
- QuickTime’s Lack of Internal Audio: By default, this recorder won’t capture internal system audio. As a result, recordings of app sounds will be silent. You have to use tools like BlackHole to capture your Mac’s internal sound.
- No Microphone Permission: QuickTime Player doesn’t get access to your Mac’s microphone, so it can’t record external sound. For this, make sure that the audio input isn’t set to “None” when recording.
- Misconfigured Audio Output: Mac audio might be muted or routed to headphones, so QuickTime’s mic hears nothing. In System Settings, go to Sound and set the output to internal speakers and raise the volume so sound can be captured.
- Low Mic Volume or Noise Reduction: You may face this issue due to microphone input level. Plus, problems with noise reduction settings can prevent audio from registering. In System Settings, access Sound and then Input to raise the input volume slider. Now, disable the Ambient Noise Reduction option to easily record screen and sound on Mac.
- Software Issues: An outdated QuickTime Player or macOS bugs can cause recording glitches, resulting in no sound. To fix this issue, update these systems to the latest versions.
2.How Do I Record My Screen and Audio Together?
Now that we’ve seen common sound problems, let’s explore how to properly record screen and audio on a Mac. We’ll cover built-in methods and a specialized app for this task:
1. QuickTime Player
QuickTime Player is the built-in macOS tool for screen capture. It can record the entire screen or a selected area to help you present or make content. Moreover, this tool will include audio from your chosen microphone or input device.
However, QuickTime cannot record internal system audio, so any computer sound won’t be captured without extra software. While recording screen and sound on Mac, you can choose the microphone in Options or record with no sound by deselecting audio.
Can QuickTime Record Screen and System Audio?
No, QuickTime cannot capture the Mac’s internal system audio. It only records sound from selected input devices, such as microphones. To record your computer’s audio, like game sounds or videos, you must install an audio routing plugin. Some of the best routing extensions include Soundflower and BlackHole.
Can I Add Sound to a QuickTime Screen Recording?
Yes, QuickTime allows you to choose your audio source, such as a built-in microphone, to record background sound or voice-over. After recording, users can also add audio afterward by dragging an audio file into the open video.
Once added, simply export the combined recording to your device. Go through the steps given below to record screen and audio on Mac.
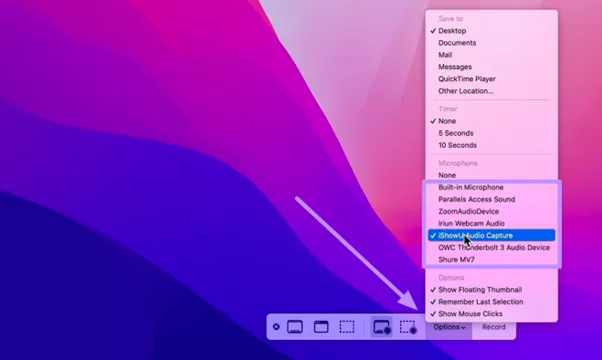
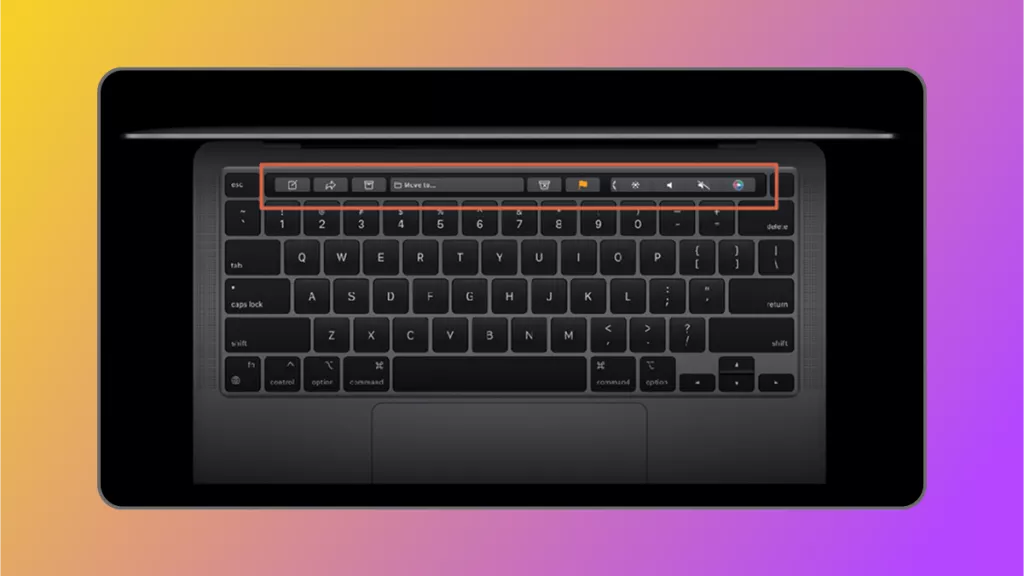
Step 1. After launching QuickTime Player from the Applications folder, tap on the File option at the top left of your screen. Now, hit New Screen Recording or press Command + N to start recording the screen.

Step 2. Using the newly appeared floating toolbar, select the screen area you want to record. Then, tap Options and choose any of the connected microphones from the menu.
Can I Also Record Camera and Screen at the Same Time on Mac?
With QuickTime’s New Movie Recording feature, users can record from the Mac’s webcam. This is useful for webinars or tutorial videos where you want to show yourself alongside screen content. Take guidance from these steps to record both the screen and your camera at the same time.
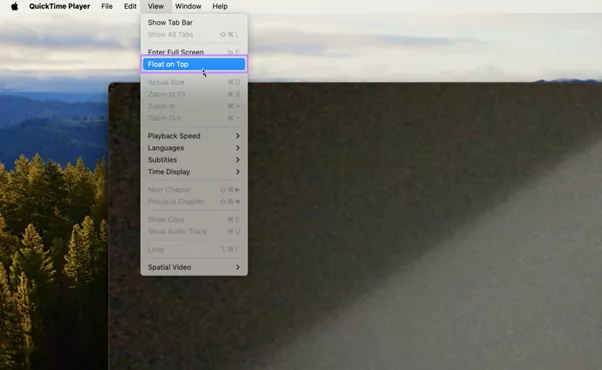
Step 1. Start the process by opening QuickTime Player and tapping New Screen Recording from the File menu. After adjusting the recording settings as explained above, again access the File menu and hit New Movie Recording.

Step 2. Once your camera recording pops up, adjust its settings by revealing the View menu. From here, pick Float on Top to record the screen and camera at the same time.
2. QuickRec
QuickRec is a lightweight app specifically designed to capture internal audio. It benefits from macOS 13 or above’s system-level audio recording for a much better screen recording with sound on Mac. Moreover, this recording tool offers one-click internal audio capture without needing any plugins.
Using this app, you even get 10 free trial recordings before purchase. Follow these instructions to capture internal audio while recording the screen.
Step 1. After launching QuickRec on your MacBook, choose the recording area. While doing so, opt for full screen, window selection, or custom area. To configure sound settings, enable the System Audio and Microphone options.
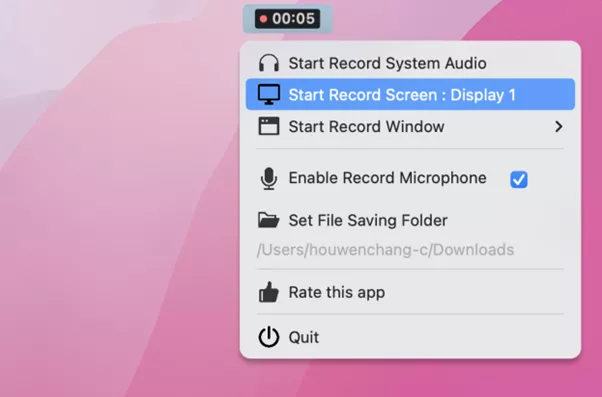
Step 2. Finally, simply tap the Record button or press Command + Shift + R to start capturing the screen and internal audio. Throughout the recording, monitor the levels of sound with the help of a menu bar indicator.

3.Bonus Tip. Boost Your Screen Recording Workflow with UPDF
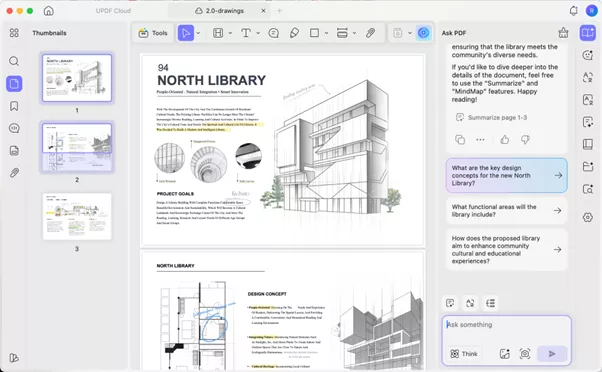
Writing a script and organizing content is key to professionally recording screen and sound on Mac. In this regard, UPDF can improve the recording workflow with its AI-powered tools. With this tool, you can manage scripts, audio content, and notes all in one place.
Beyond editing files, UPDF also offers text-to-speech and other editing features. All these tools help you draft scripts and extract text from any sources, so you can focus on recording.
Windows • macOS • iOS • Android 100% secure
Key Features
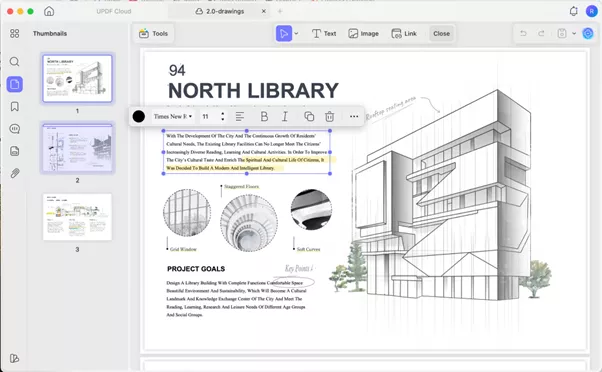
- Script Management: Use UPDF to edit and annotate your video script as a PDF. You can format text, add highlights, and refine your script outline before recording. With this tool, users can even organize script pages in the right order.
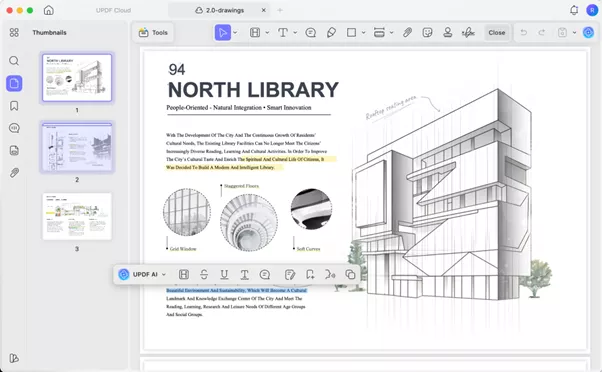
- Text-to-Speech: UPDF can read your text aloud on its iOS and Mac versions. Simply select the script text and use the Speak feature to preview narration. This helps check pacing and create audio files directly from your script.

- AI Script Generator: Using its built-in AI chat, users can draft and refine their script content. They can even ask the AI chatbot to summarize topics or draft sections based on their notes, speeding up content creation.
- OCR and Annotation: If you captured slides or scanned materials, its OCR can convert images into editable text. You can then highlight key points and add comments to your PDFs, making it easy to reference important details in your narration.
4.FAQ
1.Does the Mac have a built-in video editor?
Yes, macOS includes some basic video editing tools, such as QuickTime Player. This tool can trim clips and rearrange video segments. For full editing features, Apple provides iMovie, which you can download for free from the App Store.
2.Why doesn't my Mac screen recording have sound?
Sometimes, your Mac screen recording has no sound simply because the wrong audio source is selected or due to limitations of the built-in QuickTime Player. To fix this issue, double-check that the right mic is selected and record system sound using a third-party app.
3.How to merge audio and video on Mac?
You can use QuickTime Player to merge audio and video on a MacBook. For this, open your video file in this tool and drag your audio file onto the QuickTime window. The audio track will be added under the video. Finally, go to File and tap Export to save a new movie with the combined audio and video.
Conclusion
In summary, recording screen and audio on Mac requires the right settings and tools. We’ve covered why default recordings often come out silent and how to fix them. To record screen and sound, you can use QuickTime Player or install QuickRec to grab system audio.
For better recording workflows, we recommend you download UPDF to benefit from its AI-driven tools. Such features help you prepare scripts, generate narration, and organize content for improved recording sessions.
Windows • macOS • iOS • Android 100% secure


 Enrica Taylor

 Enola Miller
 Enid Brown
 Delia Meyer